How to Cut a Leather Belt By Yourself: Step-by-Step Guide

Are you frustrated with belts that don’t quite fit right or fail to complement your style? It’s time to fix that yourself. In this guide, we’ll walk you through how to trim a leather belt for a custom fit. Whether you’ve just bought a belt from our collection of premium Italian handmade shoes and leather accessories or you have an old favorite that needs some adjusting, this simple DIY process will help you achieve the perfect fit. Let’s dive in and get started!
Tools You’ll Need to Customize and Trim Your Leather Belt:
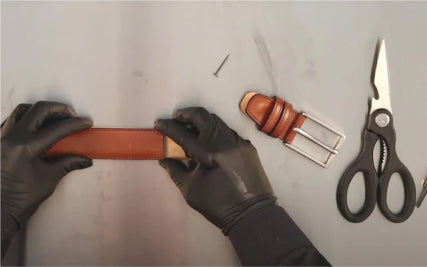
- Leather Belt: The belt you’re working on, of course.
- Measuring Tape or Ruler: To get the exact length you need.
- Marker or Pen: For marking where to cut.
- Sharp Scissors or Utility Knife: For a clean, precise cut.
- Sandpaper: To smooth out the edges after trimming.
- Flat Work Surface: A sturdy and even area for easier cutting.
How to Cut a Leather Belt: A Step-by-Step Guide
Step 1: Measure with Precision
Before grabbing those scissors or knives, the first thing you need to do is measure your waist properly. Use a measuring tape or ruler to find the perfect belt length, but don’t forget to add a couple of extra inches just in case. This gives you some flexibility for any future changes in waist size.
Step 2: Mark Your Cut Points
Once you’ve figured out the right length, it’s time to mark where you’ll cut. Start from the belt’s tip and measure towards the buckle, marking the spot where it should be trimmed. Make sure your line is straight and even, and use a pen or marker for clarity.
Step 3: Cutting with Care
Now comes the crucial part: cutting the belt. For thinner belts, sharp scissors can do the trick, but for thicker leather, a utility knife is more effective. Lay the belt flat on a stable surface and follow your marked line slowly and steadily to make a precise cut.
Step 4: Smoothing the Edges
After cutting, the edges might feel a bit rough or uneven. To give your belt that smooth, polished finish, use sandpaper. Gently rub it along the cut edges until they're smooth and even. Be careful not to scuff the rest of the belt while doing this.
Step 5: Final Touches and Styling
Your newly resized leather belt is now ready for action. Slip it through your belt loops, fasten the buckle, and enjoy the perfect fit. This simple DIY project not only customizes your belt to your liking but also enhances your overall look. For a complete style upgrade, pair your belt with our premium Italian handmade shoes, adding a refined touch to your ensemble.
Cut and Fit Your Leather Belt with Precision
Cutting your leather belt to achieve the perfect fit doesn’t have to be complicated—it can be a rewarding, hands-on project. With just a few basic tools and some patience, you can tailor a belt that not only fits comfortably but also adds a touch of personal style to your wardrobe. Whether you’re looking to customize a belt from our collection of Italian handcrafted leather goods or breathe new life into an old favorite, these easy-to-follow steps will guide you. Make your belt uniquely yours, and elevate your style effortlessly.


